How to transfer data from one cPanel account to another (Data Transfer in 2 servers)
- September 12, 2015
- Blog Posts
- Posted by Administrator
- Comments Off on How to transfer data from one cPanel account to another (Data Transfer in 2 servers)
- Transferring data from one server to another server using cPanel is very easy. You just have to follow some simple steps mentioned below.
Before you start: In order to follow these steps correctly, you must have a cPanel login for your domain account for the old server. You also need the WHM login for the new server to create the same domain cPanel account in the new server. Once you have made the same domain in the new server, you can start following the rest of the steps.
The first part of the whole process needs to be done at your old host first; then, the second part needs to complete at the new server.
Remember: The purpose of this whole operation is to move your files from one server to another. It will not impact your emails or Databases either. You may have to edit your database configuration files once you complete the files and database migration. With the help of this process, you will not have to download your files from the current server and then upload it again to the new server.
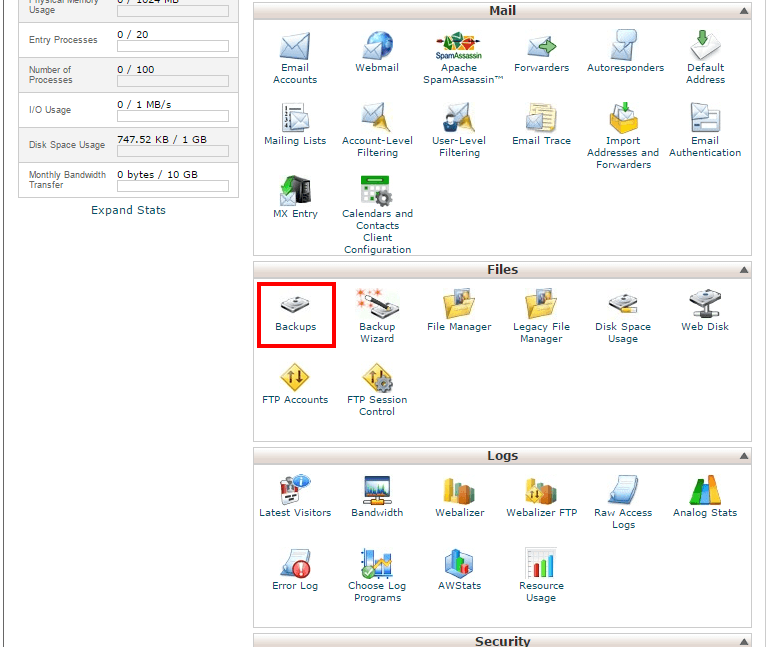
First, log in to your Old server cPanel account you wanted to migrate the data from, and follow the below steps.

- That will take you to the new page, where you have to select the button titled “Download a Full Website Backup”.

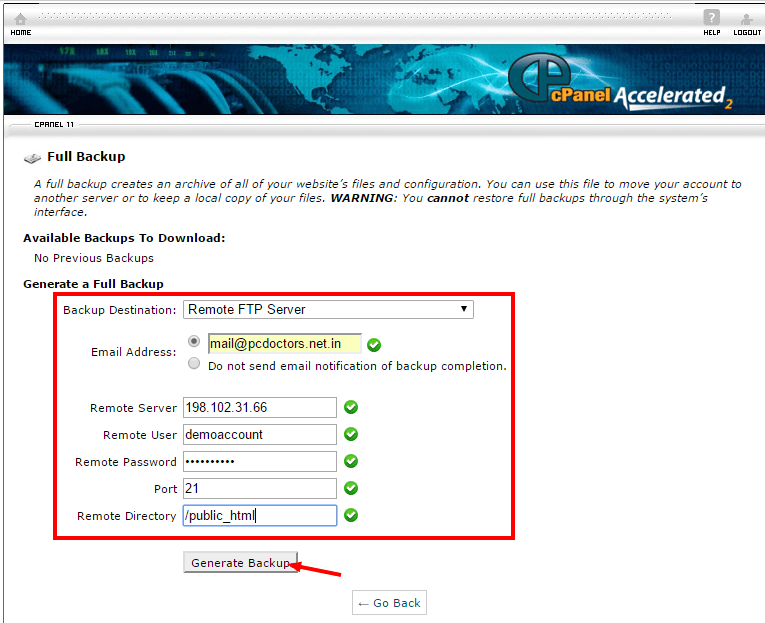
- That action will take you to a new page, and this is the most important page to set up the file transfer.

- Backup Destination: Remote FTP Server.
- Email Address: (This email id is required to send a task complete email)
- Remote Server: The new server IP
- Remote User: New server cPanel account user name
- Remote Password: New server cPanel account password
- Port: default FTP port ’21’
- Remote Directory: /public_html (cPanel hosted sites)
- Once you fill in all that information and click on the Generate backup button, the backup process will be begun and it’ll take some time to complete. Once the process will complete, you’ll receive an email for a task completed.

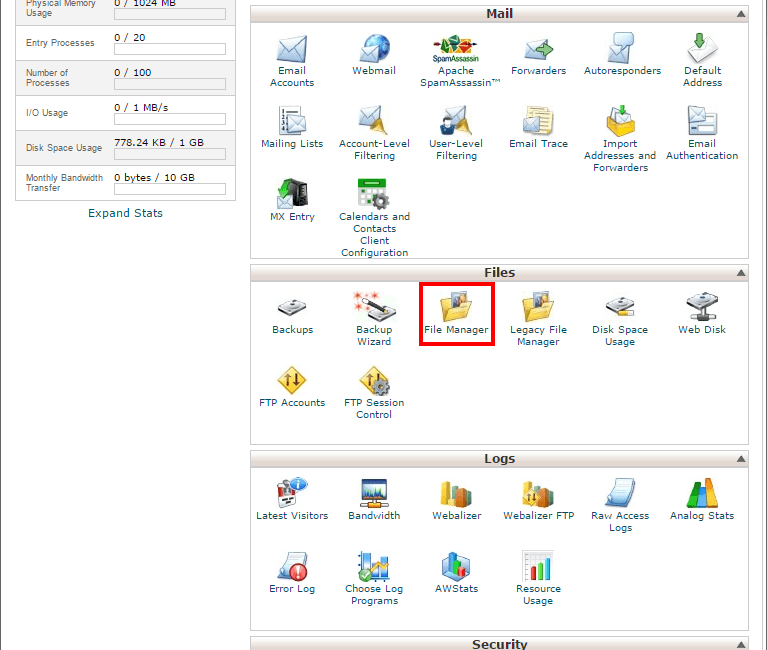
Now, you have to log in to your New Cpanel account and follow the below steps.
- Locate the Icon “File Manager” next to backups.

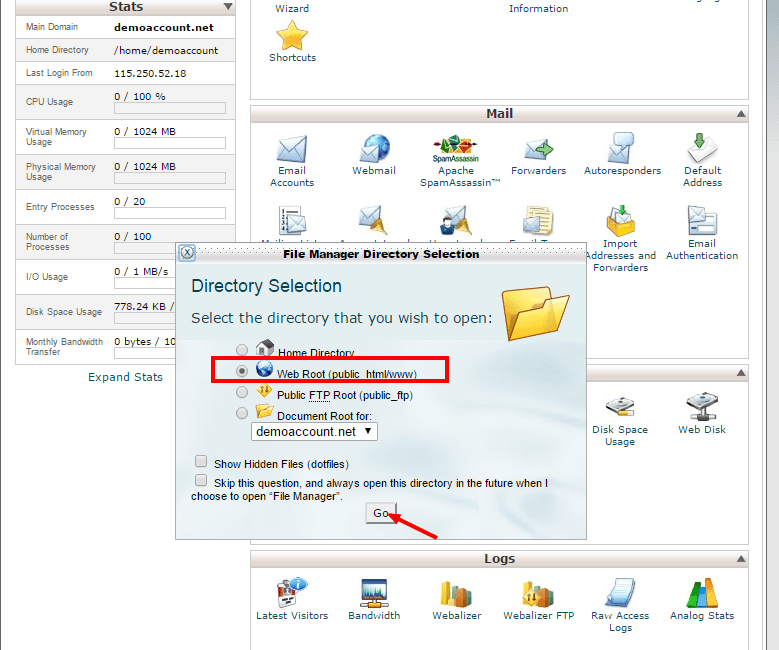
- Once you click on “File Manager” a pop-up box will appear and ask you to choose a destination location. Select Option “WebRoot (Public_html/www)

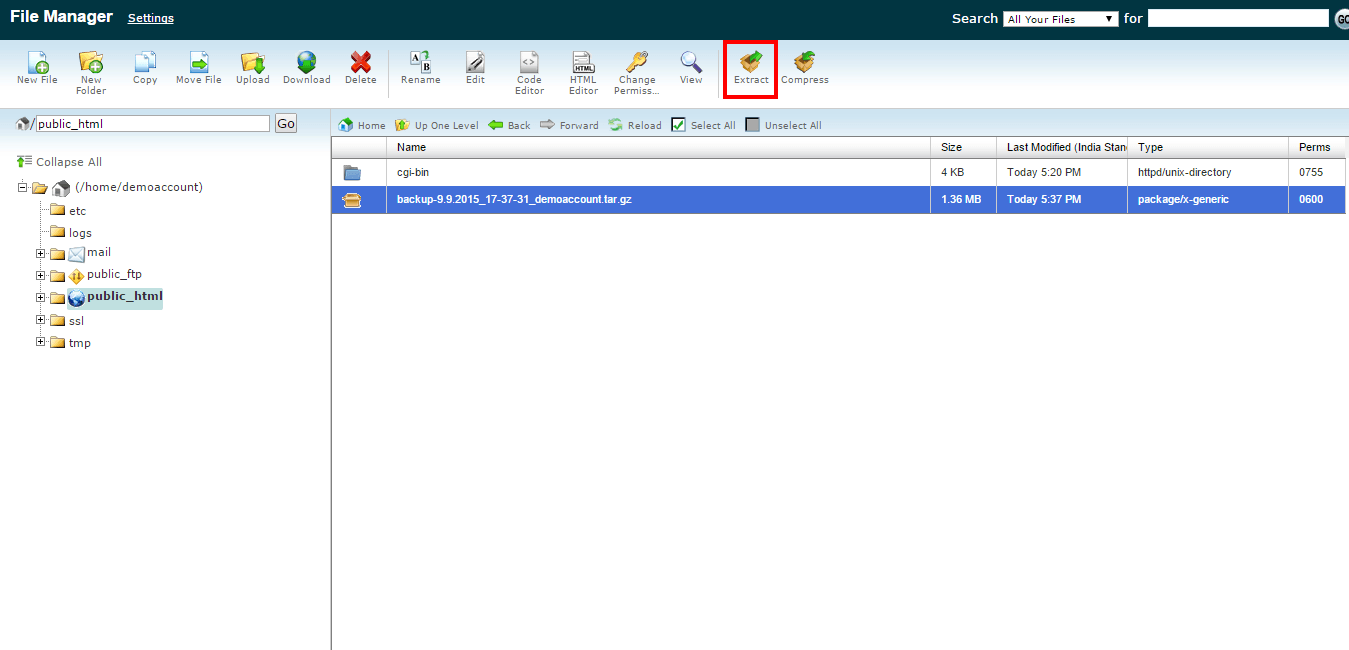
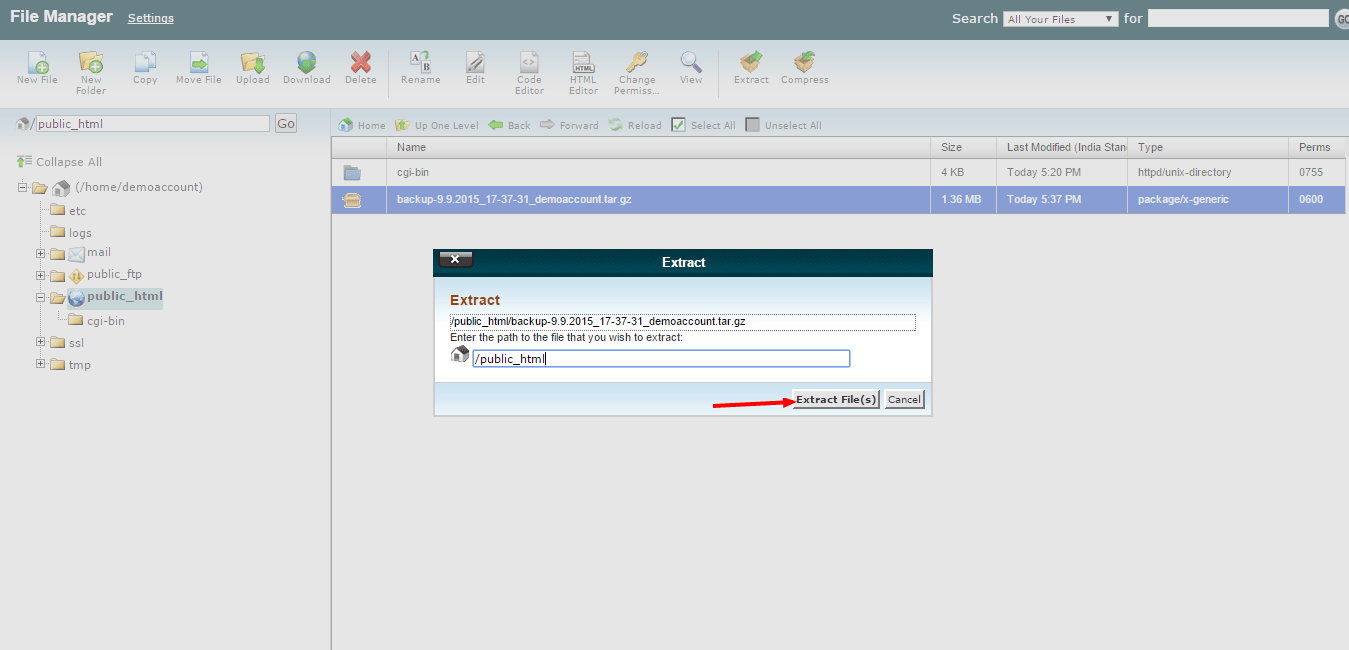
- Once you are inside the File Manager, you’ll be able to see the ZIP file which contains all the files from your old server. All you have to do now is to select the zip file and choose the button “Extract” from the toolbar at the top.

- Use default values for ZIP extraction.
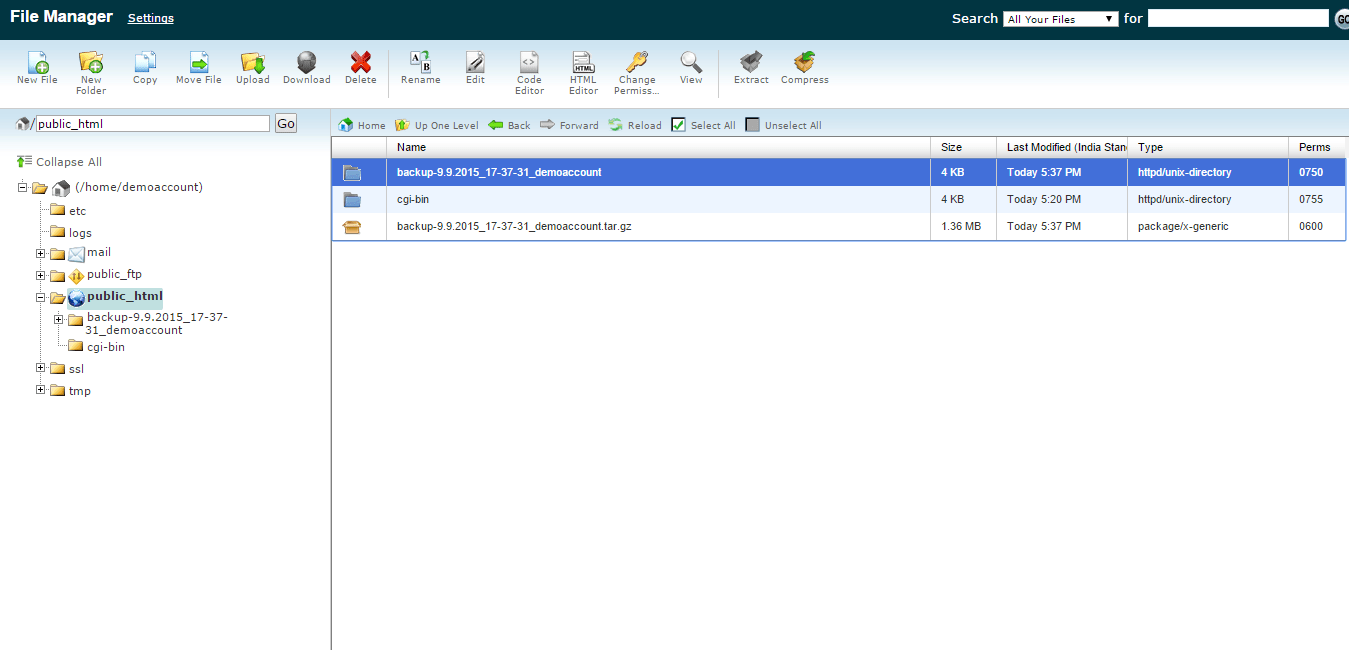
- Once the ZIP files extraction completes, you’ll be able to see another directory with the same name as the zip file.
- Enter inside the directory and navigate to the subdirectory “home directory”.
- Inside the home directory, look for the subdirectory “public_html”.
- Select the contents of ‘public_html’ and click on the “move tool” from the top toolbar.
- A pop-up box will appear, where you have to specify the target location to move the files. Since you want to move files to the root directory enter the location as “/public_html”.
- Now all your files inside the “public_html” subdirectory have been moved to the “publich_html” document root. So your file transfer process has completed.

Once you know that, the files have been moved to the root directory “public_html”. you can then delete the zip file and the rest of the unzipped content, which you no longer need.